weblog

技術的なメモ置き場。

Kotlinでdataクラスのマッピング

Kotlinでdataクラスのマッピングするためのメモ。
Beanマッピングでおなじみの(?)MapStructを使用する。

Kotlin: 1.3.61
MapStruct: 1.3.1.Final

MapStruct

公式サイトにKotlinのサンプルがある。

github.com

build.gradleに以下を追加する。

dependencies {
    // omit...
    implementation 'org.mapstruct:mapstruct:1.3.1.Final'
    kapt 'org.mapstruct:mapstruct-processor:1.3.1.Final'
}

dataクラスを用意する。
各プロパティは mutable かつ nullable で、引数なしのセカンダリコンストラクタを用意する必要がある。

data class Person(
    var firstName: String?,
    var lastName: String?
) {
    constructor() : this(null, null)
}

data class PersonDto(
    var firstName: String?,
    var lastName: String?
) {
    constructor() : this(null, null)
}

Mapperクラスを用意する。

@Mapper
interface PersonMapper {
    fun map(dto: PersonDto): Person
    fun map(person: Person): PersonDto
}

以上で準備は完了。動かしてみるとマッピングしてくれる。

fun main() {
    val mapper = Mappers.getMapper(PersonMapper::class.java)

    val dto = PersonDto("家康", "徳川")
    val person = mapper.map(dto)
    println(person) // -> Person(firstName=家康, lastName=徳川)

    val personDto = mapper.map(person)
    println(personDto) // -> PersonDto(firstName=家康, lastName=徳川)
}
mapstruct-kotlin

マッピングできたのは良いが、MapStructを使うために mutable やnullable にしたり、セカンダリコンストラクタの用意が必要だったり使うには少しためらわれる。 この問題を解決するのが mapstruct-kotlin 。

github.com

build.gradleに以下を追加する。

dependencies {
    // omit...
    api 'com.github.pozo:mapstruct-kotlin:1.3.1.1'
    kapt 'com.github.pozo:mapstruct-kotlin-processor:1.3.1.1'
}

dataクラスに @KotlinBuilder を付与する。

@KotlinBuilder
data class Person(
    val firstName: String,
    val lastName: String
)

@KotlinBuilder
data class PersonDto(
    val firstName: String,
    val lastName: String
)

MapperクラスはそのままでOK。

@Mapper
interface PersonMapper {
    fun map(dto: PersonDto): Person
    fun map(person: Person): PersonDto
}

以上で準備は完了。期待通りマッピングしてくれる。

fun main() {
    val mapper = Mappers.getMapper(PersonMapper::class.java)

    val dto = PersonDto("家康", "徳川")
    val person = mapper.map(dto)
    println(person) // -> Person(firstName=家康, lastName=徳川)

    val personDto = mapper.map(person)
    println(personDto) // -> PersonDto(firstName=家康, lastName=徳川)
}
Firebase Hostingを試す

firebase.google.com

開発環境の準備

Dockerfile

FROM node:12-alpine
RUN apk update && \
    apk add git && \
    npm install -g npm && \
    npm install -g firebase-tools
WORKDIR /app

docker-compose.yml

version: '3.7'
services:
  app:
    build: .
    ports:
      - 5000:5000
      - 9005:9005
    volumes:
      - ./:/app
    tty: true

portsの5000はserveしたとき、9005はFirebase CLIでログインするときに必要になる。

以下のコマンドでコンテナを起動できればOK。

$ docker-compose up -d --build

Firebaseの設定

起動したコンテナに入る。app はワークディレクトリ。

$ docker-compose exec app sh

Googleにログイン。

# firebase login

使用状況を送るか聞かれるので適当に選ぶ。

# firebase login
i  Firebase optionally collects CLI usage and error reporting information to help improve our products. Data is collected in accordance with Google's privacy policy (https://policies.google.com/privacy) and is not used to identify you.

? Allow Firebase to collect CLI usage and error reporting information? (Y/n)

表示されたURLにアクセスして認証する。

# Visit this URL on this device to log in:
https://accounts.google.com/o/oauth2/auth?.........

Waiting for authentication...

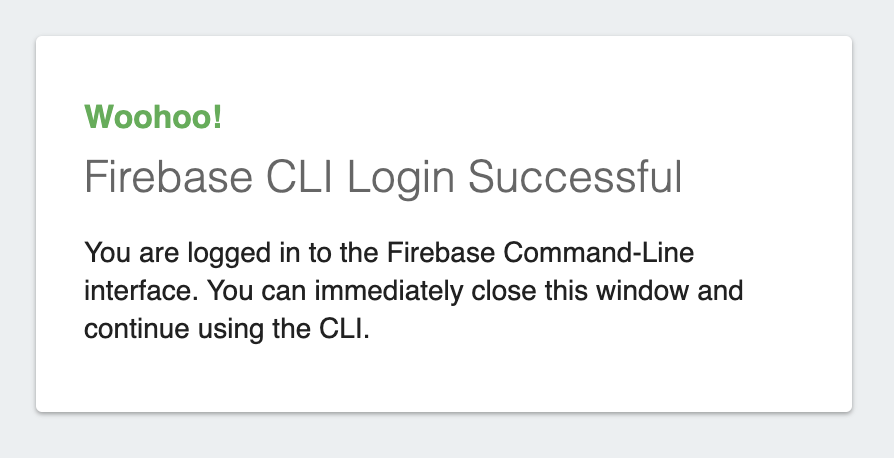
認証に成功すると以下の画面が表示される。

f:id:kentama7:20191022095336p:plain

Firebaseプロジェクトの作成

Firebaseプロジェクトを作成する。

# firebase init

Hostingを選択する。

# firebase init

     ######## #### ########  ######## ########     ###     ######  ########
     ##        ##  ##     ## ##       ##     ##  ##   ##  ##       ##
     ######    ##  ########  ######   ########  #########  ######  ######
     ##        ##  ##    ##  ##       ##     ## ##     ##       ## ##
     ##       #### ##     ## ######## ########  ##     ##  ######  ########

You're about to initialize a Firebase project in this directory:

  /app

Before we get started, keep in mind:

  * You are currently outside your home directory

? Which Firebase CLI features do you want to set up for this folder? Press Space
 to select features, then Enter to confirm your choices.
 ◯ Database: Deploy Firebase Realtime Database Rules
 ◯ Firestore: Deploy rules and create indexes for Firestore
 ◯ Functions: Configure and deploy Cloud Functions
❯◉ Hosting: Configure and deploy Firebase Hosting sites
 ◯ Storage: Deploy Cloud Storage security rules

Firebaseプロジェクトの設定。状況に合わせて選択する。 今回はFirebaseコンソールでプロジェクトは作成済み。

=== Project Setup

First, let's associate this project directory with a Firebase project.
You can create multiple project aliases by running firebase use --add,
but for now we'll just set up a default project.

? Please select an option: (Use arrow keys)
❯ Use an existing project
  Create a new project
  Add Firebase to an existing Google Cloud Platform project
  Don't set up a default project

Hostingの設定

publicディレクトリを設定する。今回はデフォルトのまま進める。

=== Hosting Setup

Your public directory is the folder (relative to your project directory) that
will contain Hosting assets to be uploaded with firebase deploy. If you
have a build process for your assets, use your build's output directory.

? What do you want to use as your public directory? (public)

SPAにするかどうか設定する。

? Configure as a single-page app (rewrite all urls to /index.html)?

設定が完了するとfirebase.jsonや.firebasercファイルが生成される。

ローカルで動作確認

Dockerコンテナで動かしているのでHostを指定する。

# firebase serve --host 0.0.0.0

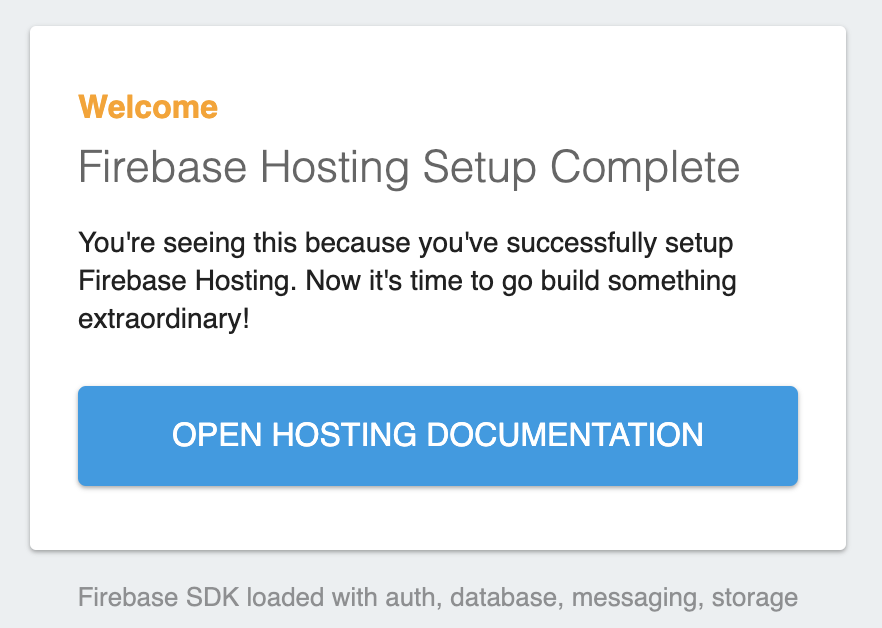
http://localhost:5000にアクセスすると以下の画面が表示される。

f:id:kentama7:20191022100900p:plain

デプロイ

ローカルで動作確認が取れたらデプロイする。

# firebase deploy

=== Deploying to 'shoueian-18de6'...

i  deploying hosting
i  hosting[shoueian-18de6]: beginning deploy...
i  hosting[shoueian-18de6]: found 2 files in public
✔  hosting[shoueian-18de6]: file upload complete
i  hosting[shoueian-18de6]: finalizing version...
✔  hosting[shoueian-18de6]: version finalized
i  hosting[shoueian-18de6]: releasing new version...
✔  hosting[shoueian-18de6]: release complete

✔  Deploy complete!

Project Console: https://console.firebase.google.com/....
Hosting URL: https://xxxxxxxxxx.firebaseapp.com

Hosting URLにアクセスするとデプロイされていることが確認できる。

Micronaut + Thymeleaf を試す

  • Micronaut: 1.2.2
  • Thymeleaf: 3.0.11.RELEASE

適当なディレクトリでMicronautアプリを生成。

$ mn create-app -f kotlin -i

dependenciesにmicronaut-viewsとThymeleafを追加。

build.gradle

implementation "io.micronaut:micronaut-views"
runtimeOnly "org.thymeleaf:thymeleaf:3.0.11.RELEASE"

一旦適当なテキストを返すControllerを用意する。

import io.micronaut.http.annotation.Controller
import io.micronaut.http.annotation.Get

@Controller
class ViewController {
    @Get
    fun index() = "test"
}

アプリケーションを起動してGetしてみる。

$ curl http://localhost:8080 -i
HTTP/1.1 200 OK
Date: Mon, 23 Sep 2019 05:08:15 GMT
content-type: application/json
content-length: 4
connection: keep-alive

test

テンプレートの表示

src/main/resources にviewsディレクトリを用意し、index.html を作成する。

<!DOCTYPE html>
<html lang="ja">
<body>
test
</body>
</html>

@View

先ほど作成したControllerを修正する。
@View に作成したテンプレートファイル名を指定する。

import io.micronaut.http.HttpResponse
import io.micronaut.http.annotation.Controller
import io.micronaut.http.annotation.Get
import io.micronaut.views.View

@Controller
class ViewController {
    @Get
    @View("index")
    fun index() = HttpResponse.ok<String>()
}

アプリケーションを起動してGetしてみる。

$ curl http://localhost:8080 -i
HTTP/1.1 200 OK
Content-Type: text/html
Date: Mon, 23 Sep 2019 05:14:41 GMT
content-length: 44
connection: keep-alive

<!DOCTYPE html>
<html lang="ja">
<body>
test
</body>
</html>

ModelAndView

@ViewではなくModelAndViewを使っても同等のことが行える。 Controllerに以下のメソッドを追加する。

@Get("modelandview")
fun modelandview() = ModelAndView("index", "")  // 第一引数にテンプレートファイル名を指定

アプリケーションを起動してGetしてみる。

$ curl http://localhost:8080/modelandview -i
HTTP/1.1 200 OK
Content-Type: text/html
Date: Mon, 23 Sep 2019 05:21:14 GMT
content-length: 44
connection: keep-alive

<!DOCTYPE html>
<html lang="ja">
<body>
test
</body>
</html>

変数の表示

以下のテンプレートファイルを用意する。

src/main/resources/views/pet.html

<!DOCTYPE html>
<html lang="ja" xmlns:th="http://www.thymeleaf.org">
<body>
<h1 th:text="${name}"></h1>
<h1 th:text="${age}"></h1>
</body>
</html>

POJOを使った場合

以下のPOJOを用意する。

data class Pet(
    val name: String,
    val age: Int
)

Controllerに以下のメソッドを追加する。

@Get("pojo")
@View("pet")
fun pojo() = HttpResponse.ok(Pet("taro", 10))

アプリケーションを起動してGetしてみる。

$ curl http://localhost:8080/pojo -i
HTTP/1.1 200 OK
Content-Type: text/html
Date: Mon, 23 Sep 2019 05:31:51 GMT
content-length: 80
connection: keep-alive

<!DOCTYPE html>
<html lang="ja">
<body>
<h1>taro</h1>
<h1>10</h1>
</body>
</html>

Mapを使った場合

Controllerに以下のメソッドを追加する。

@Get("map")
@View("pet")
fun map() = HttpResponse.ok(mapOf("name" to "jiro", "age" to 2))

アプリケーションを起動してGetしてみる。

$ curl http://localhost:8080/map -i
HTTP/1.1 200 OK
Content-Type: text/html
Date: Mon, 23 Sep 2019 05:44:01 GMT
content-length: 80
connection: keep-alive

<!DOCTYPE html>
<html lang="ja">
<body>
<h1>jiro</h1>
<h1>2</h1>
</body>
</html>

ModelAndVIewとPOJOを使った場合

Controllerに以下のメソッドを追加する。

@Get("modelandviewpojo")
fun modelAndViewAndPojo() = ModelAndView("pet", Pet("saburo", 3))

アプリケーションを起動してGetしてみる。

$ curl http://localhost:8080/modelandviewpojo -i
HTTP/1.1 200 OK
Content-Type: text/html
Date: Mon, 23 Sep 2019 05:49:24 GMT
content-length: 82
connection: keep-alive

<!DOCTYPE html>
<html lang="ja">
<body>
<h1>saburo</h1>
<h1>3</h1>
</body>
</html>